Extended Project Week 10:
Extended Project Week 10:
30/05/2022
Now that this is the final week of this project until the deadline, I had planned out the next couple
days to make sure I would be able to finish all of my makeup looks as soon as possible, in order to
begin writing up my article piece for the magazine.
Me and my model arrived at college at around 9am to get an early start, ensuring I would have
enough time to get at least two of my looks done today. I decided to start off with the hardest one I
had designed, the Great Fairy, so that I would be able to tell how much time I would have in order
to be able to do the next one (possibly two) looks today.

The image above shows my final result. Before taking the images, I had made sure the Canon
camera was set to portrait mode in order to get the best results for these photographs. Portrait
mode causes the camera to make the model the centre focus in all of the images, resulting in the
best quality outcome for what I am trying to achieve.
However, as is clear in the photos, the jewellery piece is missing. This is because whilst I wasn’t
there, according to another student, some students from perhaps a different course supposedly
went into the cupboard and had a mess around, resulting in my piece getting flung on the floor. The
student said that she had picked it back up from where she had found it and placed it onto the
middle shelf. However, when I saw it, it was folded over and stuck together. I tried to carefully pull it
apart, however, the two ends and middle piece were firmly stuck together, therefore when I finally
managed to pry it apart, the whole piece was unusable. Not only had most of the paint and smaller
details been ripped off, but it left a few holes in it too. This has taught me to, next time, make sure to
keep any important pieces of work in a safe place, out of reach from anyone else.
Once I had taken and checked over the images, we had decided to take a small break to clean up
and relax for a bit before setting my base back up and moving onto the next character, Undyne.
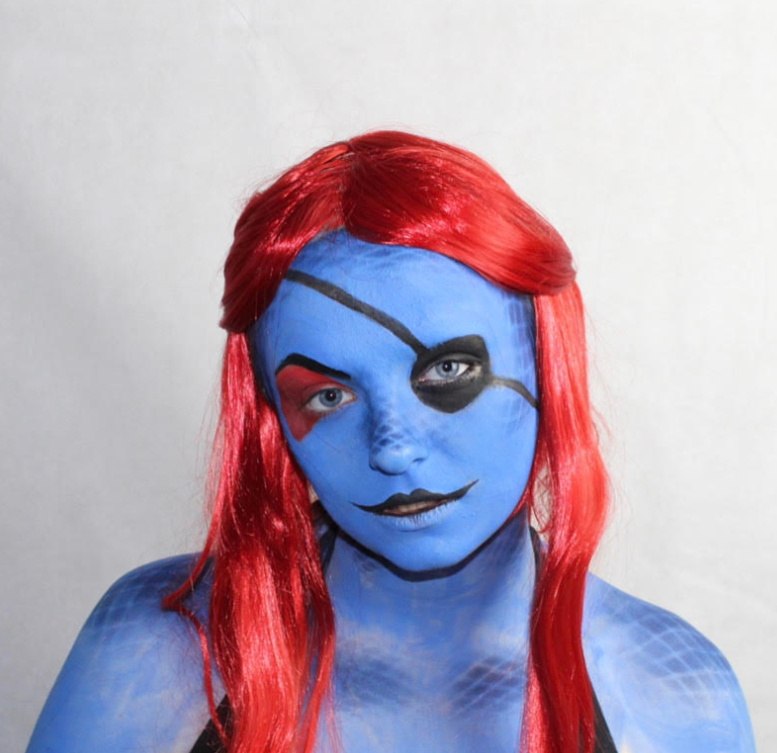
The image above shows the final result of the look. This one didn’t really go as planned and, as a
result, didn’t fit in well with the brief. This was mainly because I wasn’t able to style the wig, as well
as create the fins as, since the original character had a ponytail, this was also what I had planned
for this hairstyle. However, since the wig was very thin and had many choppy layers to it, I wasn’t
able to style it as planned and had to leave it down with the fringe pieces pinned back as neatly as
possible.
I also wasn’t able to get the fins done as when I first ordered the materials I had planned to use for
these, I was sent the wrong type of foam. Therefore, I tried to make them out of paper instead.
However, these wouldn’t hold up when stuck to the ear when I tried them out. Therefore I had to
get rid of the fins altogether.
The eyepatch also just didn’t arrive in time and therefore had to be painted on using watercolour,
which causes the edges to be patchy since the model was slightly teary-eyed today, which showed
up on camera.
However, the painted on scales, the eyebrow, the base colour and the eye makeup all displayed
what I had in mind for this character, had they not been pixelated.
31/05/2022
On this day, I had planned to finish off my third look, however, since I was also modelling today, I
didn’t get a chance to do so.
01/06/2022
On today, the final day, I managed to get my third and final character finished, Cassandra
Dimitrescu.
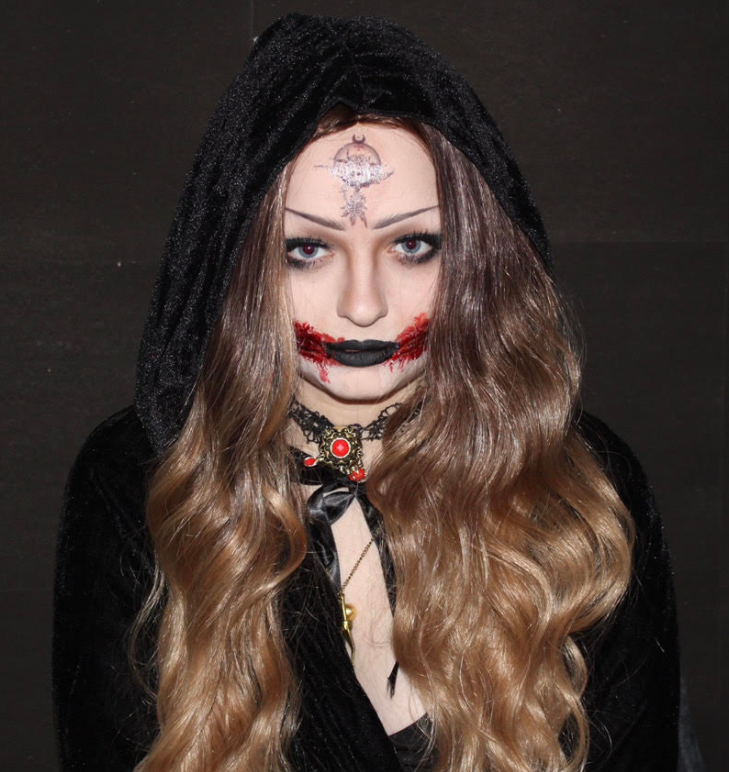
The image above shows the final product of my look. Overall, this was by far the best character out
of all three as she fits perfectly in the brief. This is because all aspects of the look: the hair,
makeup and costume together perfectly depict this character. However, there are a few aspects
that could be improved, such as adding fake blood/gloss to the lips and perfecting the contour on
the nose as it is patchy in some areas.
06/06/2022
Since this week is our deadline for our final project, we spent most of the day working as a team to produce the final product of the Makeup Artist Magazine. Over the past few weeks, we had done a small amount of research into which software would be best to use in order to produce the magazine to a high quality, ranging from free software to paid software, and we all eventually settled on using the app Canva as it is not only free, but has many different customise options for us to use, such as different text fonts, different colours of pages and different layout ideas, all of which would fit into the overall theme we were aiming for, similar to the actual MUA Magazines. Kassie had downloaded the app on her IPad for us all to use to layout our articles.
We started by discussing as a group the order everyone wanted the articles to be in - who will be first to write up their article all the way to who will be the last to do so. We also decided to take a group photo for the front cover. However, since the area we were going to be taking the photo in was too small to fit us all onto the white backdrop, someone came up with the idea to take a photo of three people at a time and edit the separate pictures together to make it look like a group photo. However, instead we just decided to take one big group photo as close to the white backdrop as possible. Someone also had the idea to send in individual pictures of ourselves for the back of the magazine, to which we all collectively agreed on.
While waiting for everyone to finish writing up their articles, I went and spruced up my work a tad ready to hand in.
Then, when it came time for me to write my article up on Canva, Kassie gave me a rundown on the different features and how to use them before I got started on my title page and article page. I also had a little look through everyone else's article too whilst I had the chance to see what it looks like finished.
Overall, although I haven't seen it printed yet, the outcome of the magazine looks clean and professional, similar to how one of the original MUA Magazines would look.
Comments
Post a Comment